
How To Make DIY Wind Chimes: Complete Guide
As you’re considering ideas for gifts, remember that homemade is always a heartfelt and cost-saving option! A unique and simple handmade gift idea is wind chimes. So here is how to make DIY wind chimes:
- Choose your materials.
- Cut the tubing into lengths that will create the desired effect when hung from the top of your wind chime.
- Using a drill or hammer and nail, make holes in the top of your tubing for the chimes to hang from.
- String the chimes onto the tubing
- Hang your wind chime from a hook or tree branch
In this article, we’ll talk about the history of wind chimes and how to create your own beautiful wind chimes for yourself or as a gift for someone you love, as well as offer a bonus list of simple DIY gifts, so keep reading to find all of this out and more!
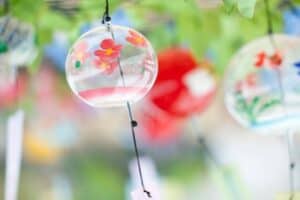
History of Wind Chimes
First, let’s learn a little bit about the history of this lovely home ornament. Wind chimes have a long and varied history, dating back thousands of years. They were first used in Asia for religious purposes and later spread to other parts of the world. Today, wind chimes are used for a variety of purposes, including decoration, relaxation, and as a source of music.
Some of the earliest known wind chimes were used in China during the Bronze Age. These chimes were often made from bronze or other metals, and they were used in religious ceremonies. Wind chimes were also popular in Japan and Korea during this time period.
Wind chimes became increasingly popular in Europe during the Renaissance. They were often used to decorate homes and gardens, and as a way to add a musical element to the surroundings. Wind chimes were also used as a way to ward off evil spirits.
Today, wind chimes are used for a variety of purposes. They are commonly used as decorations, and as a source of relaxation and music. Wind chimes are also popular gifts, and many people enjoy collecting them.

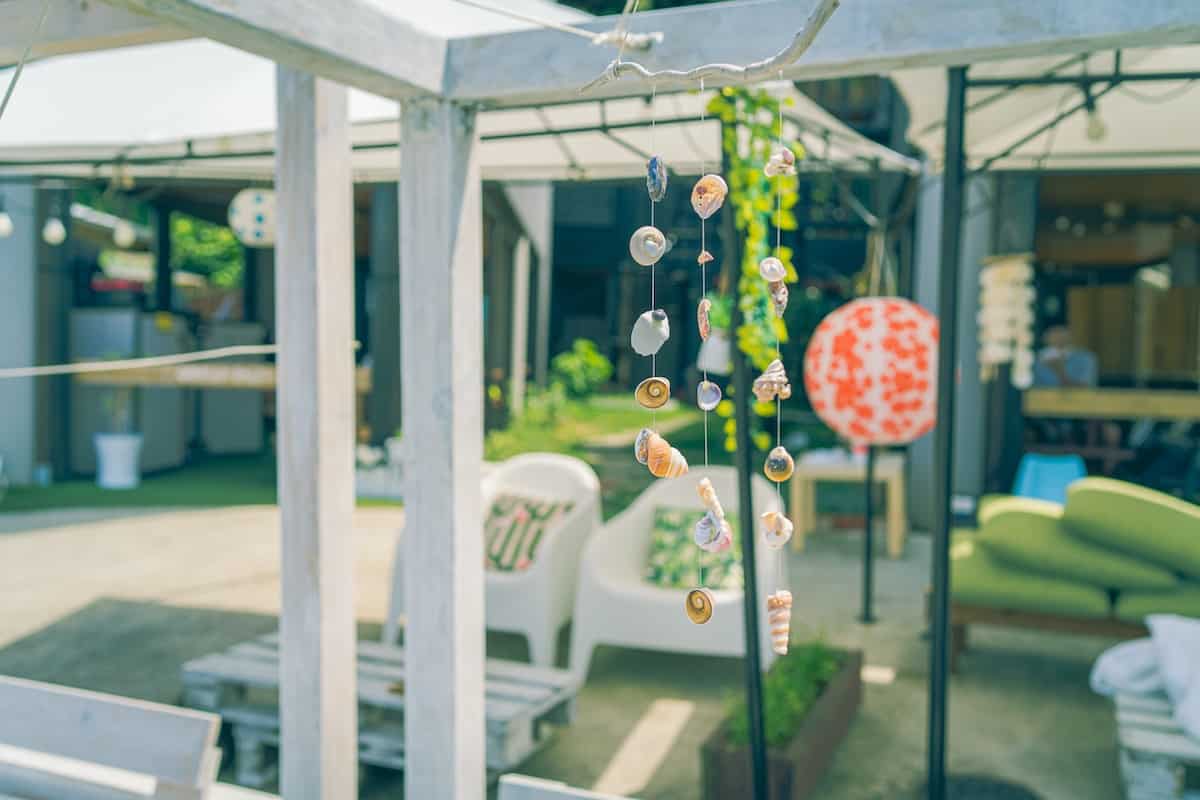
How to Make a DIY Wind Chime
Making your own wind chimes is a great way to add a personal touch to your home or garden. Plus, it’s a fun and relatively easy project that you can do with the kids! Here’s how to make homemade wind chimes in just a few simple steps.
1. Choose your materials.
You’ll need some sort of tubing for the structure of your wind chimes (copper tubing works well), as well as something to use for the “chimes” themselves. Here are some creative ideas for materials you could use for chimes:
- Seashells
- Bells
- Metal scraps
- PVC pipes
- Beads
- Rocks
- Crystals
- Wood pieces
2. Cut the tubing into lengths that will create the desired effect when hung from the top of your wind chime.
Make sure to leave enough length so that the chimes can move freely and make a pleasant sound.
3. Using a drill or hammer and nail, make holes in the top of your tubing for the chimes to hang from.
4. String the chimes onto the tubing, using a fishing line or heavy-duty thread.
Knot the end of the string securely so that the chimes won’t fall off.
5. Hang your wind chime from a hook or tree branch and enjoy!
Why Homemade Gifts are Great
Now that we’ve talked about the history of wind chimes, let’s talk about why giving a homemade gift is such a good idea. There are plenty of reasons to give a homemade gift, but here are just a few:
1. It’s personal.
A homemade gift is something that you took the time and effort to make yourself, which shows how much you care about the recipient.
2. It’s unique.
Unlike store-bought gifts, a homemade gift is one-of-a-kind and can’t be found anywhere else.
3. It’s thoughtful.
A homemade gift shows that you’ve put thought into what the recipient would like and have taken the time to create something special just for them.
4. It’s meaningful.
A handmade gift often has more meaning than a store-bought one because of the time, effort, and love that went into making it.
5. It’s inexpensive.
Homemade gifts are often much less expensive than store-bought gifts, which is great for those on a budget.
Now that you know some of the reasons why you should give a homemade gift, what are you waiting for? Let’s get started learning how to create a beautiful set of wind chimes for someone today.
Other DIY Gift Ideas
Once you have made your custom wind chimes, you might find yourself looking for more creative DIY gift ideas, and we’ve got you covered. Check out these 10 easy and impressive DIY gifts that anyone can make.
1. Photo Transfer Coasters
These coasters make a great gift for anyone who loves to entertain or who simply appreciates a good cup of coffee. With this simple DIY project, you can create coasters that feature your favorite photos, images, or patterns. Plus, it’s a great way to upcycle any unused or unwanted glass tiles or coasters you may have lying around.
To make your own photo transfer coasters, you’ll need:
-Glass tiles or coasters
-Adhesive spray or Mod Podge
-Sponge brush
-Wax paper
-Scissors
-Tape
-Paper towel or old rag
-Rubbing alcohol (optional)
-Photocopies or laser prints of your chosen images (make sure they’re mirror images!)
First, start by cleaning your glass tiles or coasters with a paper towel or old rag. If you want, you can also wipe them down with rubbing alcohol to remove any dirt or oils that might prevent the adhesive from sticking.
Next, cut out your images so they’re slightly smaller than the tiles or coasters.
Then, place a piece of wax paper over the image and tape it down. This will help to prevent any sticking or tearing when you’re applying the adhesive.
Now, working one at a time, apply a thin layer of adhesive to the wax paper-covered image using a sponge brush. Be sure to smooth it out so there are no bubbles or clumps.
Carefully peel the wax paper off of the adhesive-coated image and then place it face-down on the tile or coaster. Use your fingers to gently smooth out any air bubbles, starting from the center and working your way out.
Let the adhesive dry for at least an hour before using your new coasters! If you’re not planning on using them right away, store them in a cool, dry place until you’re ready.
2. Personalized Mugs
Another great gift idea for the coffee or tea lover in your life. Grab some plain white mugs and get creative with paint, markers, or decals.
There are plenty of ways to personalize a coffee mug – from adding a special message or design, to simply using a unique shape or color. And while you can find plenty of pre-made options out there, sometimes it’s even more fun to make your own.
Here are some ideas for how to make personalized coffee mugs:
- Add a special message: One easy way to personalize a coffee mug is to simply add a special message. This could be a quote, an inside joke, or anything else that would make the mug extra meaningful.
- Create a design: If you’re crafty, you can create your own design for the mug. This could be a hand-painted design, or even just a simple sticker.
- Use a unique shape: Another way to make a coffee mug more personal is to use a unique shape. You can find mugs in all sorts of fun and funky shapes, so this is a great way to show off your personality.
- Go for a color: If you’re not into crafty projects, you can still personalize your coffee mug by simply choosing a unique color. There are plenty of mugs out there in eye-catching colors, so this is an easy way to make yours stand out.
- Get creative with the handle: The handle is another great place to add a personal touch to your coffee mug. You can find mugs with all sorts of interesting handle designs, or you can even make your own.
These are just a few ideas for how to make personalized coffee mugs. With a little creativity, you can easily turn a plain mug into something special that will be cherished for years to come.
3. Homemade Candles
Candles are always a welcome gift, and they’re even better when they’re homemade. Choose your favorite scent and get to work! Making your own candles at home is a fun and easy way to get creative and add some personal touches to your decor. Plus, homemade candles make great gifts! Here’s a step-by-step guide to making your own candles:
- Gather your supplies. You’ll need wax, wicks, a melting pot, and some molds.
- Melt the wax in your pot.
- Add the wicks to the molds.
- Pour the melted wax into the molds, filling them to the top.
- Allow the candles to cool and harden.
4. Recipe Cards
If you know someone who loves to cook, this is the perfect gift for them. Gather up your favorite recipes and write them out on some pretty cards.
5. Painted Rocks
These painted rocks are a fun and unique gift idea. You can use them as paperweights, desk decorations, or even plant markers.
6. Succulent Terrarium
A succulent terrarium is a great gift for anyone who loves plants or who needs a little bit of greenery in their life. All you need is a glass container, some rocks, and some succulents.
7. Herb Garden
Another great gift for the gardener in your life. Start with some small pots, add some soil, and then plant your favorite herbs.
8. Jar of Sunshine
This is a perfect gift for someone who could use a little pick-me-up. Fill a jar with yellow candies, lemon slices, and a sunny yellow note.
9. Homemade Bath Bombs
These homemade bath bombs make a great gift for anyone who loves to relax in the tub. They’re easy to make and can be customized with your favorite colors and scents.
Making your own bath bombs at home is a fun and easy way to enjoy a relaxing bath. All you need are some simple ingredients and a little bit of time. Here’s how to make your own bath bombs:
- Combine 1 cup of baking soda, 1/2 cup of citric acid, and 1/2 cup of cornstarch in a bowl.
- Add 1 tablespoon of water and mix until the ingredients are fully combined.
- Add 1 teaspoon of essential oil and mix again.
- Spoon the mixture into a mold of your choice (silicone molds work best).
- Allow the bath bomb to dry for 24 hours before using.
10. Friendship Bracelets
These friendship bracelets are a fun and thoughtful gift for a special friend. You can make them as simple or as elaborate as you want, and they’re sure to be cherished.
Conclusion
So, that was our guide for DIY wind chimes and some other great DIY gift ideas made from materials at home that can be great gifts for the upcoming Christmas season! We hoped this helped you and thanks for reading!